


How to Choose the Right Shower Arm in 2026?

How to Choose the Right Shower Arm in 2026?

A Shower Arm looks simple, yet it controls the showerhead’s height, reach, and spray position. The wrong choice can leave water hitting the wall, the curtain, or your shoulders unevenly. In 2026, shoppers must consider more than finish and appearance. Connection size, arm length, ceiling height, water pressure, and installation access all affect daily comfort.

Daniel O’Brian, a technical expert at SupplyHouse.com, offers a practical reminder: “Choose plumbing components for compatibility first, then consider style and convenience.” That advice remains useful when comparing stainless steel, brass, adjustable, wall-mounted, and ceiling-mounted options. A 6-inch arm may suit a compact bathtub, while a 12-inch model can improve coverage in a spacious walk-in shower. Measure carefully.

Small details matter.

Look inside the wall connection before purchasing. Some older homes use fittings that need an adapter, while newer installations may support standard 1/2-inch connections. A heavy rain showerhead can also place extra strain on a weak or poorly supported arm. This is where product specifications become more valuable than attractive photographs.

There is no perfect Shower Arm for every bathroom. A stylish matte-black arm may show mineral spots quickly. An adjustable model may improve flexibility but add another point for maintenance. I would not ignore cleaning habits, even though many buying guides do. The best decision balances performance, durability, installation difficulty, and personal reach. This guide explores those choices with practical measurements, realistic bathroom examples, and a little caution for assumptions that sound correct but may fail at home.
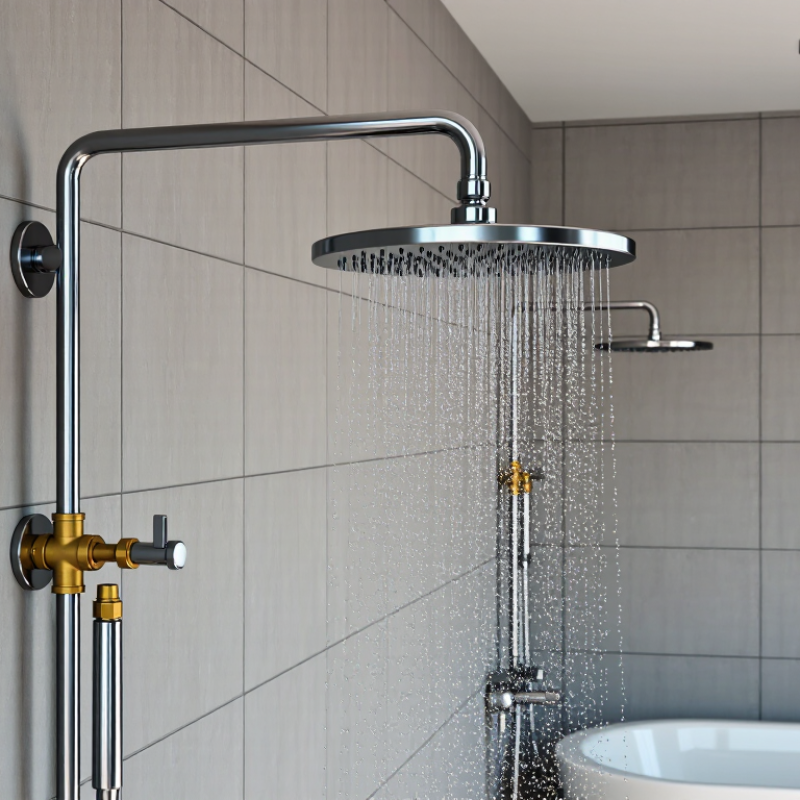
How to Choose the Right Shower Arm in 2026?

Understanding Shower Arm Types and Their Installation Positions

How to Choose the Right Shower Arm in 2026?

Understanding Shower Arm Types and Their Installation Positions

A shower arm connects the water outlet to the showerhead, but its shape affects comfort and coverage. A straight wall-mounted arm suits compact bathrooms and standard showerheads. An angled arm directs water outward, helping taller users avoid standing against the wall. A gooseneck arm adds height without opening the wall. It can feel more spacious.

Ceiling-mounted arms create a centered rain-shower effect. They work best when the ceiling outlet aligns with the user’s standing position. Measure the enclosure before choosing this design. A long arm may strike a door or look visually heavy. Adjustable arms offer flexibility, especially in shared bathrooms. However, extra joints create more possible leak points. Simple is often safer.

Position matters as much as type. Keep a wall-mounted arm high enough for comfortable clearance, usually above the tallest user’s head. Check the showerhead angle before sealing the fitting. A small change can move water onto the floor. That mistake is easy to miss during a dry installation. Use thread sealant approved for plumbing connections, then test slowly for leaks. I would not rely on hand-tightening alone. Over-tightening can damage concealed fittings, though I have seen it happen during rushed installations. Confirm local plumbing requirements, wall strength, and access to the pipe connection. A carefully measured position may still need adjustment after the showerhead is attached.


Measuring Wall Connections, Reach, Height, and Spray Coverage

How to Choose the Right Shower Arm in 2026?

Measuring Wall Connections, Reach, Height, and Spray Coverage

Start with the wall connection, not the shower head. Measure the exposed pipe thread and the distance from the finished wall surface. An arm that fits the thread may still sit too close to the wall. Check the connection size, thread direction, and sealing method before ordering. A qualified plumber can confirm hidden fittings when the pipe feels loose or unusually shallow.

Next, measure the arm’s reach from the wall outlet to the shower head center. Stand beneath the proposed spray position and mark the target with tape. The water should land near your shoulder line, not against the wall or directly over the doorway. A longer arm can improve coverage, but it also increases stress on the wall connection. That detail is easy to miss.

Height affects comfort and splash control. Measure from the finished floor to the outlet, then compare it with the tallest user’s shoulder height. Leave enough clearance for the shower head to tilt without touching the ceiling. Test the spray pattern on paper or with a temporary hose if possible. Coverage can look generous in a showroom and feel narrow at home. I still recheck every measurement after tile is installed, because “almost right” often means daily inconvenience.

How to Choose the Right Shower Arm in 2026? - Measuring Wall Connections, Reach, Height, and Spray Coverage

Selection dimension How to measure or check Useful reference Practical selection tip
Wall connection Identify the pipe thread and inspect the wall outlet (often a drop-ear elbow). Check the existing arm or plumbing documentation; do not rely on appearance alone. In North American shower installations, 1/2-inch NPT is common. Thread standards and sizes can differ by region and installation. Match the arm to the outlet thread. Use an appropriate adapter only when needed, and avoid forcing mismatched threads.
Arm reach Measure from the finished wall to the showerhead connection point, accounting for the arm’s bend and the head’s inlet position. Straight and curved arms are sold in several lengths; 6, 8, 10, and 12 inches are common nominal options, but actual projection varies by design. Choose enough projection to keep the spray away from the wall and toward the standing area. Confirm the stated reach in the product dimensions.
Showerhead height Measure vertically from the finished shower floor to the showerhead outlet or spray face after accounting for the arm’s rise or drop. There is no single ideal height for every user or shower. Ceiling clearance, user height, head design, and local requirements all matter. Check clearance for the tallest regular user and the showerhead’s angle. A drop-style arm can lower the head; a riser-style arm can raise it.
Arm shape and angle Compare the arm’s profile, outlet angle, and the showerhead’s swivel range with the available wall and ceiling space. Straight, curved, and angled arms position the head differently. The final spray direction also depends on the showerhead’s joint and adjustment range. Check the combined arm-and-head geometry before buying, especially where a high ceiling, enclosure, or nearby wall limits adjustment.
Spray coverage Review the showerhead’s spray-face dimensions, spray pattern, and specified flow rate. Consider where the user stands and how far the head projects from the wall. Coverage is determined by the showerhead and water delivery as well as the arm’s position; an arm alone does not guarantee a particular spray area. Position the head over the usable standing area and make sure the spray can be aimed comfortably without striking the enclosure or wall.
Wall support and installation Confirm that the threaded wall outlet is securely attached and that the arm can be installed without stressing or turning concealed plumbing. A shower arm threads into the wall outlet; it is not a substitute for properly secured plumbing behind the finished wall. Follow the fitting and sealing instructions for the connection. If the outlet moves, leaks, or is inaccessible, have the installation assessed before use.
Finish and maintenance Compare the arm’s finish with nearby fixtures and check the care instructions for the material or coating. Cleaning recommendations vary by finish; abrasive cleaners can damage some coated surfaces. Choose a finish that suits the bathroom and use manufacturer-recommended cleaning methods to help preserve it.

Measurements are installation-dependent. Verify thread compatibility, dimensions, and local plumbing requirements before purchasing or fitting a shower arm.

Choosing Materials, Finishes, and Corrosion Resistance

How to Choose the Right Shower Arm in 2026?

Choosing Materials, Finishes, and Corrosion Resistance

A shower arm faces constant water, steam, minerals, and temperature changes. Its material deserves more attention than its shape. Stainless steel offers strong corrosion resistance and a clean appearance. Brass feels solid and handles threaded connections well. However, material quality and wall thickness still matter. A cheap alloy can disappoint.

I once focused only on the finish and ignored the internal threads. That mistake caused early staining near the connection. Check the threads carefully. They should be clean, accurately formed, and free from rough edges. For areas with hard water, choose a corrosion-resistant core and avoid finishes that expose weak metal underneath.

Finish affects maintenance as much as appearance. Chrome is easy to wipe, but water spots remain visible. Brushed finishes hide small marks better. Matte surfaces may need gentler cleaning because abrasive powders can damage their texture. PVD finishes can provide better wear resistance, yet performance depends on proper application and product testing.

Look for clear information about salt-spray testing, coating thickness, and material composition. These details are more useful than vague claims such as “premium quality.” Also inspect the installation area. Poor sealing can trap moisture behind the arm and create corrosion that the finish cannot prevent. Local water chemistry may change the result, so even a well-made shower arm needs regular drying and sensible cleaning.

Matching the Shower Arm to Your Showerhead and Plumbing System

How to Choose the Right Shower Arm in 2026?

The right shower arm must match both your showerhead and your plumbing system. Measure the existing arm before shopping. Check its thread size, length, angle, and connection point. In many homes, the wall connection uses a 1/2-inch threaded fitting, but regional standards can differ. Never assume.

A heavier showerhead needs a strong, properly supported arm. Large rain showerheads often work better with ceiling-mounted arms or reinforced wall fittings. A long wall arm may improve coverage, but it can also create extra leverage on the concealed elbow. That detail is easy to miss. Check your water pressure and flow rate, too. A wide showerhead may feel weak in a low-pressure system. An adjustable arm can help correct height and spray direction, but it cannot fix poor plumbing.

Tips: Remove the old arm carefully and inspect the threads for corrosion. Use suitable thread sealant, then tighten firmly without forcing it. Test for leaks before closing the wall or fitting the final trim. If the connection moves inside the wall, stop. A licensed plumber should inspect it. My practical warning is simple: a beautiful showerhead cannot compensate for an unsuitable arm. I have seen small mismatches cause dripping, vibration, and uneven spray. Measure twice. Buy once.

Checking Compatibility, Standards, Maintenance, and Long-Term Value

How to Choose the Right Shower Arm in 2026?

A shower arm should match your existing plumbing, not just your preferred shape. Measure the wall outlet, thread size, arm length, and available ceiling clearance. Many installations use a 1/2-inch connection, but regional standards can differ. Check the fitting carefully.

Small errors matter.

During installation, I have seen a short arm push water against the wall. A long arm can create unwanted leverage on concealed pipes. Confirm the outlet direction and showerhead weight before tightening anything. Use a suitable thread sealant, avoid over-tightening, and check local plumbing requirements. Certified materials are preferable, especially for warm water and frequent use.

Maintenance affects long-term value. Wipe mineral deposits from the arm and showerhead regularly with a soft cloth. Avoid harsh abrasives that can damage the finish. Inspect the connection after several showers. A small damp ring may reveal a failing seal before serious wall damage develops. Removable joints are easier to service than sealed decorative designs. That detail is easy to overlook.

The cheapest option may not remain inexpensive. A durable arm, replaceable seals, and accessible connections can reduce future repair work. Still, appearance is not proof of quality. Ask for material details, pressure ratings, and installation guidance. I would also allow a little design flexibility, because perfectly matching every measurement is rarely realistic in an older bathroom.